The genesis of the "Blossom Feet", or more commonly known as the "Budding foot vulgaris.

I know Whether the Weather God is being good or bad to us when he decided to end the scorching heat right at the beginning of my vacation. At least I used the time to knit blossoms instead of taking care of the real-life samples. I'm entering the crazy summer socks Blossom contest with my feet.
I find great contests! Easy to get a topic to think about how to implement it, see what others make of it and pursue different directions (which I would not personally have dreamed). My favorites are the lilies of the valley socks, have you ever seen more erotic socks? Where can be sock + Adult probably not contradictory, right?
I think that the contest is great! Just to get topic, to ponder about it and think about how to put it together, to see how the others are interpreting it and ending up in different directions (Which directions would never have occurred to me). My favorites are the Lily of the Valley Socks. Have you ever seen any socks that are more erotic than those? Although socks + erotic just can not be any more different, right?
* sighs * Let us just change the topic.
I tried to put down the development of my finicky bloomy job in writing, even just for the purpose of being able to knit up the twin sock without having to rely only on my memories. It was hard! I have to declare that I'm a big critique of written patterns myself; I always find something to complain about in almost all written pattern. Repentant and meek, I now know better and won't be so outspoken about it again in the future.
So, what do you expect from a pattern?
I love clear and self-explained pictures.
Concise and spot on explanation and instructions that do not distract you from the essentials.
charts without all the long written out pattern rows for rows.
With all these intentions in mind, I'm going to try my luck and document the birth of Blossom Feet


stop of 56 meshes with two needles.
Cast on 56 stitches with two needles.
are knitted 7 / 2 circles, each with 8 stitches. A half-circle consists of three segments (pie or triangular)
You will be knitting 7 half-circles with 8 stitches each. A half-circle is made out of three sections (a slice of cake or a triangle).

1. Segment:
1.R. Hinreihe: 2 Maschen rechts wenden
2.R. Rückreihe: 2 Maschen rechts wenden
3.R.: 3M rechts, wenden
4.R.: 3M rechts, wenden
5.R.: 4M right, contact
6.R.: 4M right, contact
7.R.: 5M right, contact
8th round: 5M right, contact
9.R.: 6M right, contact
10R. 6M right, contact
11.R.: 7M right, contact
12.R.: 7M right, contact
13.R.: 8M right, contact
14.R.: 8M right
A Section:
Row 1 (RS): k2, turn the work
Row 2 (WAS): k2, turn the work
Row 3: k3, turn
Row 4: k3, turn
Row 5: k4, turn
Row 6: k4, turn
Row 7: k5, turn
Row 8: k5, turn
Row 9: k6, turn
Row 10: k6, turn
Row 11: k7, turn
Row 12: k7, turn
Row 13: k8, turn,
Row 14: k8
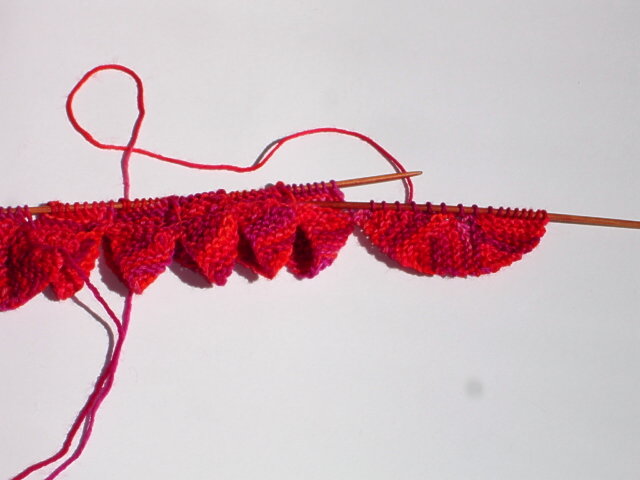
The first triangle is complete. With the same 8 stitches after the entry for the first triangle knit the second and third as well. In the second picture, I used different colors to the three triangles that form a semicircle to show more clearly.
The first triangle is now finished. Knit the second and third triangles using the same pattern as the first triangle. In the second picture I used different colors for each triangle that builds up the-half circle in order to show you the process more clearly.
The second semi-circle stitch is knitted with 9-16, the third with 17-24 mesh etc. are 7 to semicircle and involved all the ailing 56 stitches were .
The second half-circle is knit with 9-16 stitches. The third with 17-24 stitches and so forth and so on, until there are 7 half-circles altogether and all the CO 56 stitches are knit.
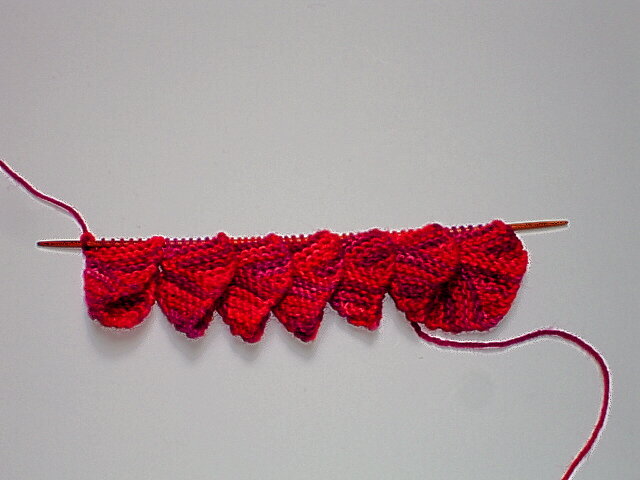
The final semi-circles on a Needle:
The finished half-circle on a needle:
With an empty needle now the first 8 stitches are lifted, they extend to the center of a semicircle. From the edge of the second half to knit 8 stitches.
The first eight stitches are then slipped with an empty needle, this should go to about the middle of the half-circle. Knit 8 stitches from the edge of the second half.
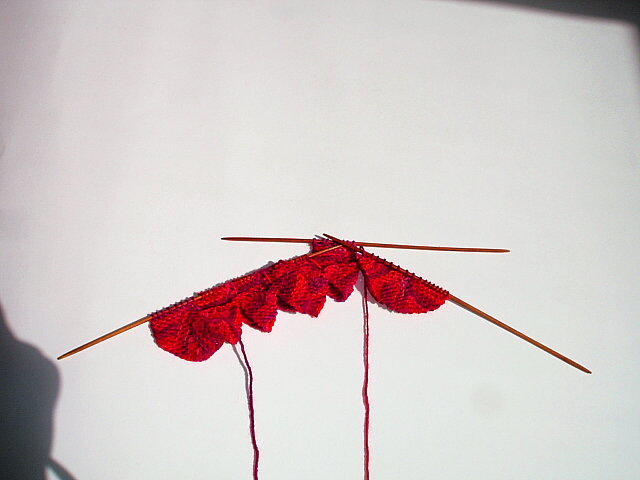
The next 8 stitches are removed with a third needle and folded to the left.
The next eight stitches are then slipped with a needle and then folded Third to the left.
Now the half-circles are overlapping before a while 2 needles together.
The half-circlees are now laid on another and overlapped at the same time the 2 needles are beside each other.
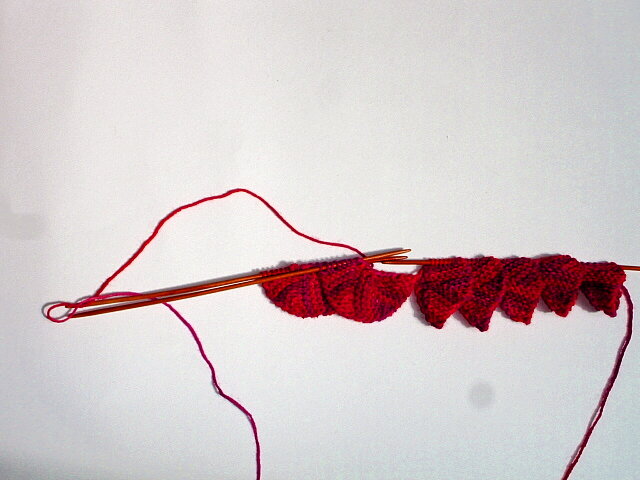
Of these two needles with 8 stitches of the "three needle bind off method together right knitted but not cast off.
eight stitches from these two needles are going to be knit together with the "three-needles bind off" method but, do not bind off the stitches.
contact work and knit 8 stitches right
turn the whole work and knit 8 stitches.

can now again 8 stitches from the edge of the next circle knitting and be in the same manner as described just now, are knitted together overlapping.
Now you can knit another 8 stitches from the edge of the next circle pattern, folding them and then knitting them together following the above.
If all half-circles are connected to the circuit must be closed. But knitting is the last and the first 8 stitches together overlapping. The 56 stitches I distributed evenly on four needles and took in the first round shaft to 2 stitches per needle yet.
The circle should be closed when all the circles are joined together. To do this, you knit the last and the first eight stitches overlapped together. The 56 stitches are distributed evenly over four needles / DPNs. You will therefore need to increase two stitches each on needles in the first round of knitting.

should the final Flower border look like. Be flexible if this is not so and is happy to have you created something new.
And the finished edge should look Blooming Sun Be flexible when it's not exactly like the picture and just be happy that you have created something new!
copyright by Rohrspatz & Wollmeise